How to Transfer Animals Between Cages
Need to separate breeders, consolidate weanlings, or rehouse an animal? Move animals between cages right from the Rack view. Moustra keeps each animal's full history intact and updates both the source and destination cage headcounts automatically. Transfers are done one animal at a time from the rack.
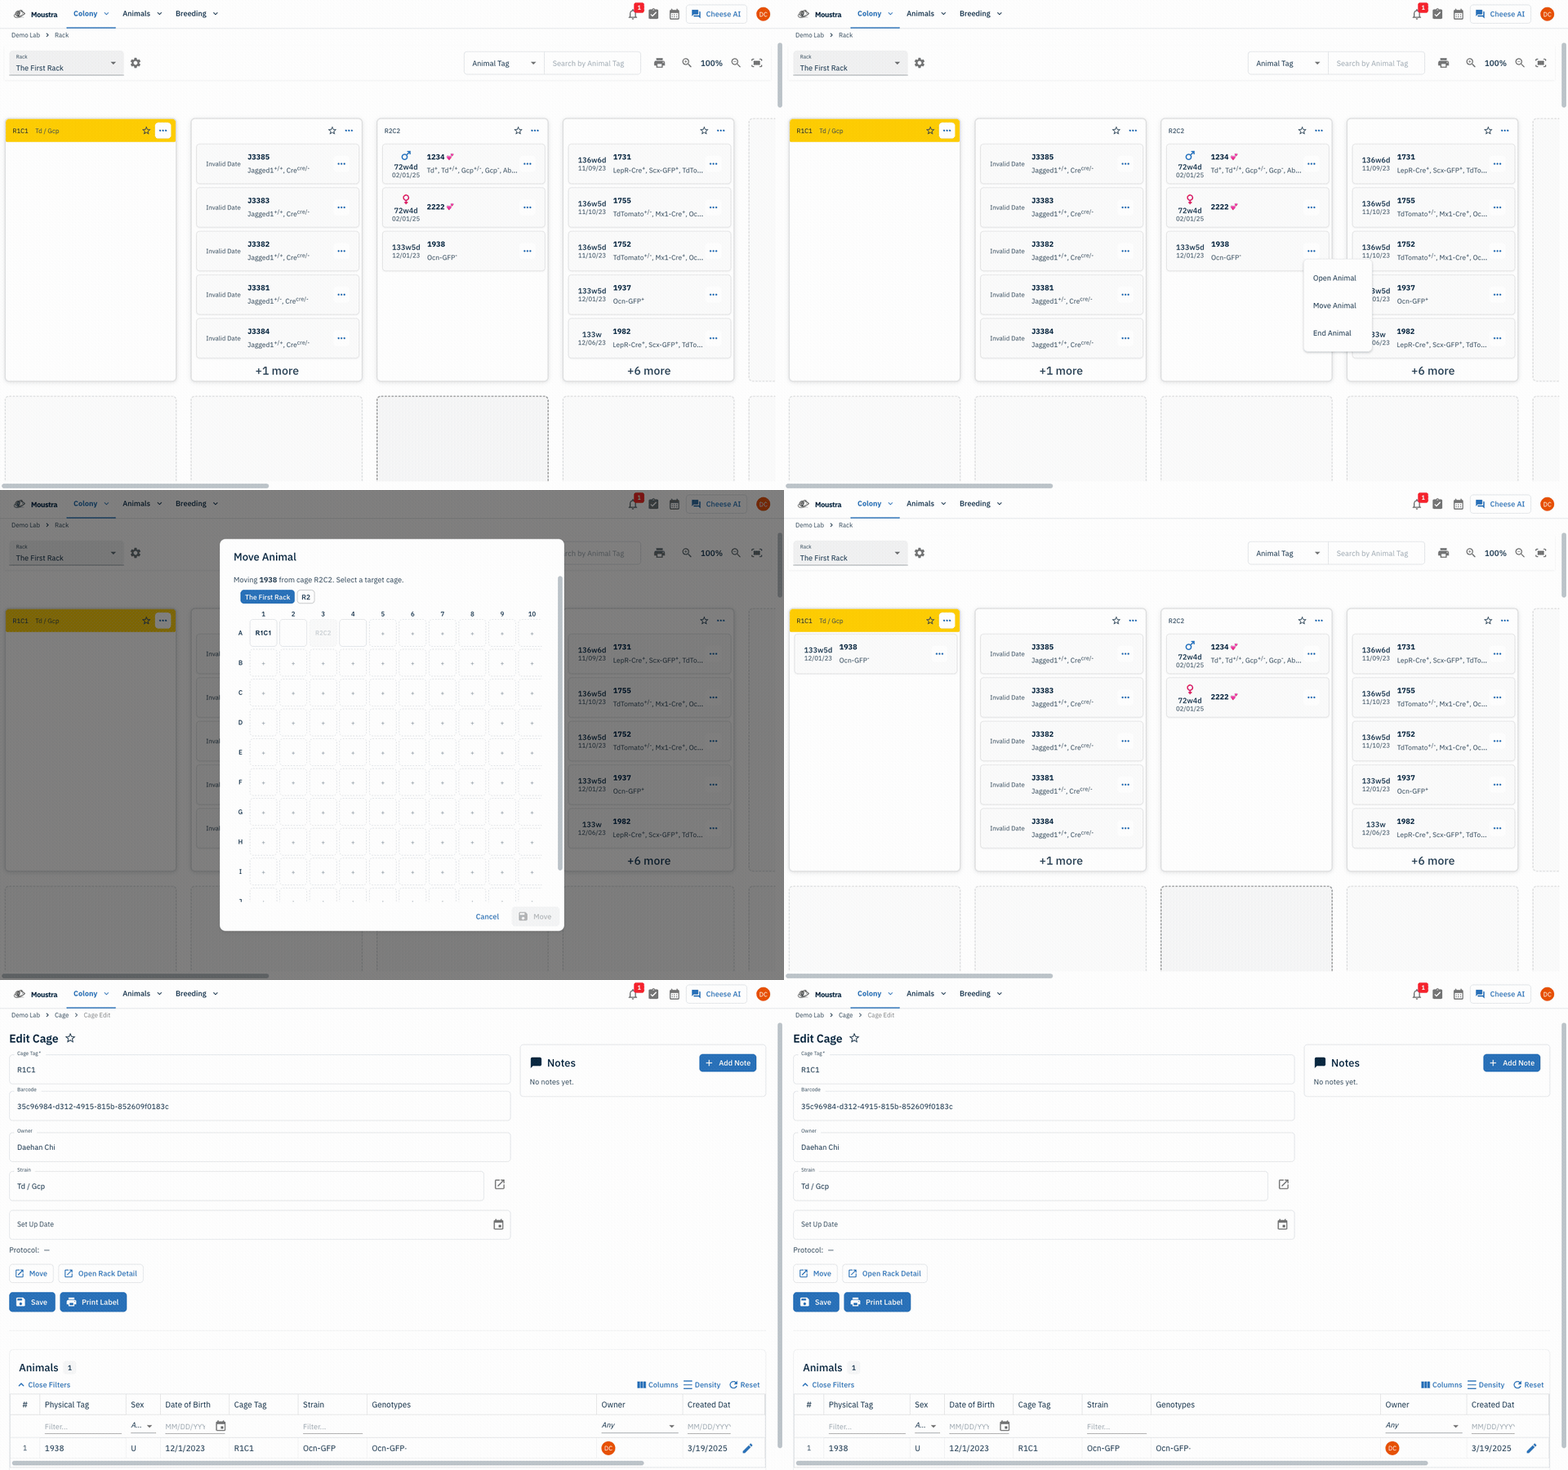
Open the Rack view
Open Colony → Rack. The rack lays out your cages spatially—each card is a cage showing the animals it currently houses.
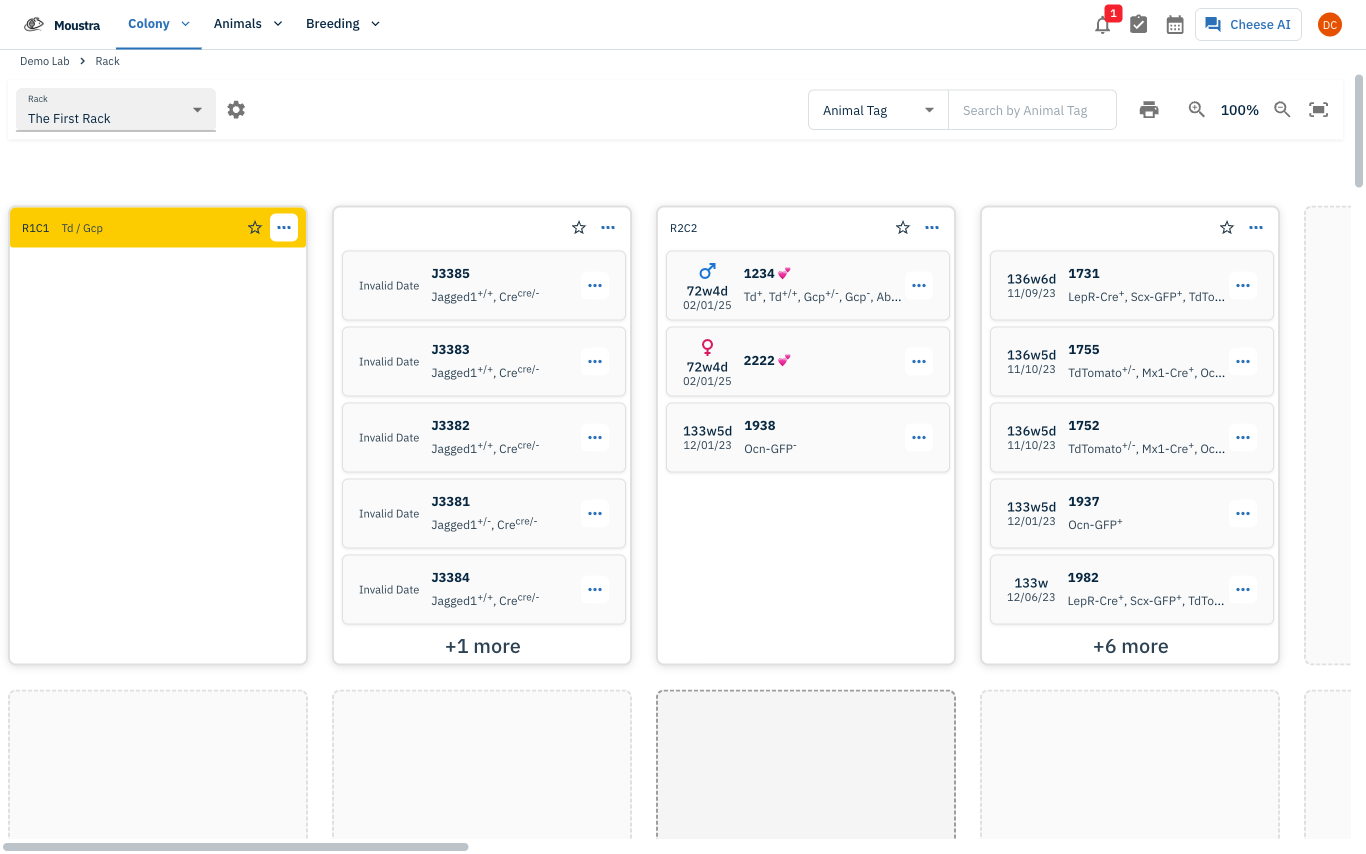
Open the animal's menu
Find the animal you want to move, click the ⋯ menu on its card, and choose Move Animal.
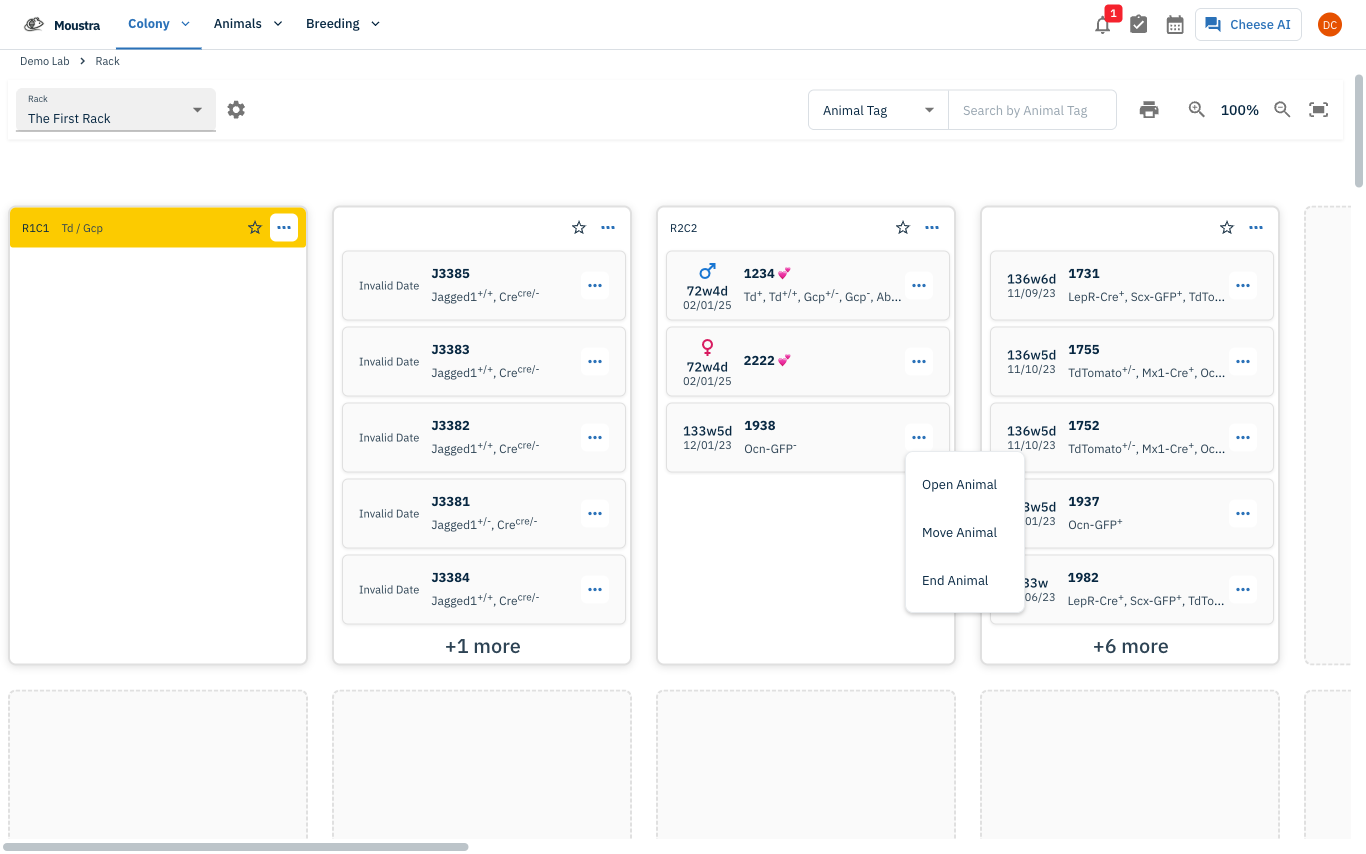
Review the Move Animal dialog
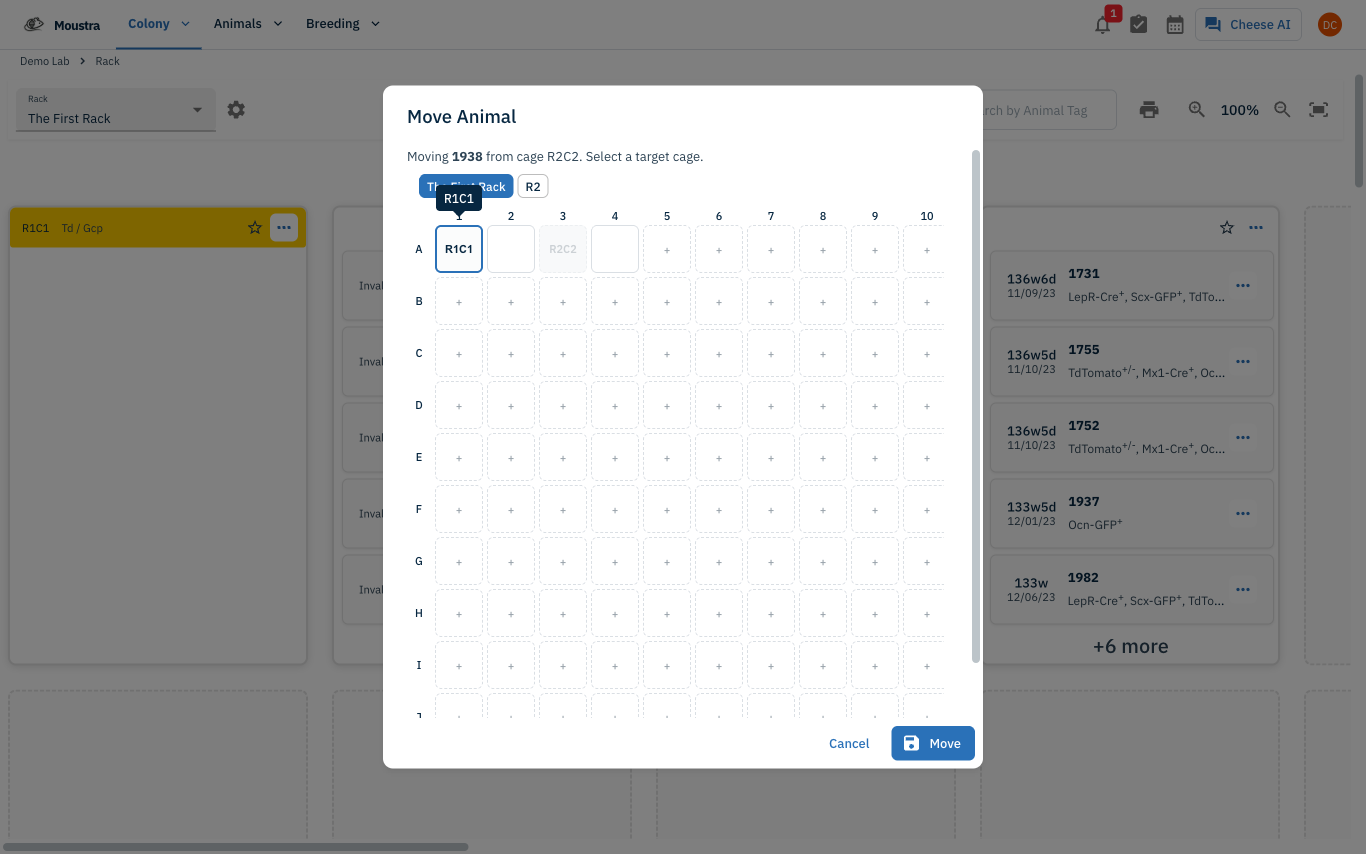
The Move Animal dialog opens and confirms which animal you're moving and its current cage. If the destination is on a different rack, switch racks using the buttons at the top of the grid.
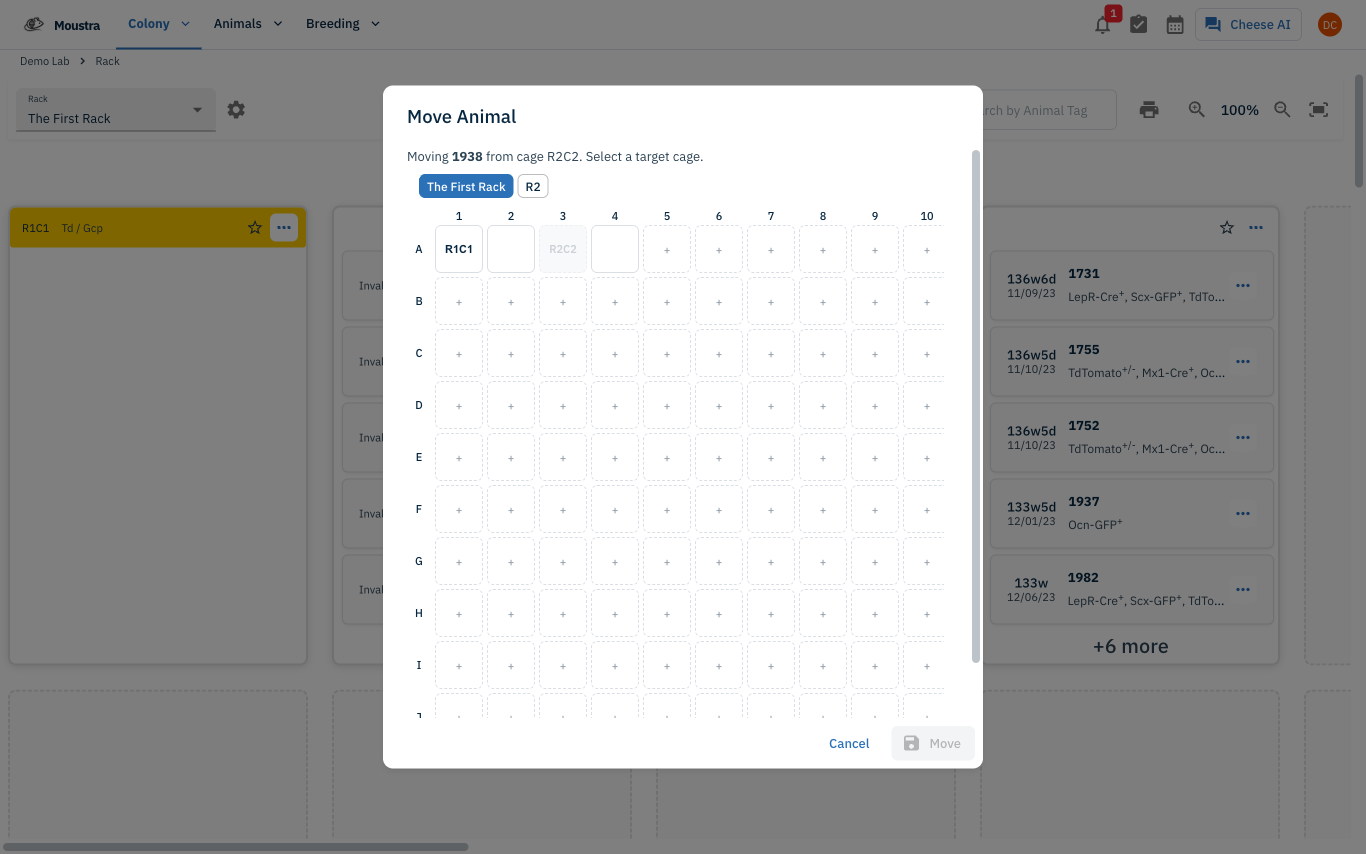
Pick the destination cage
Click the target cage in the rack grid. Cages already in use show their tag (for example R1C1); click an empty + slot to create a brand-new cage in that position. The animal's current cage is greyed out.
Confirm the move
Click Move to commit. Moustra reassigns the animal to the destination cage and updates both cages' headcounts instantly, keeping the animal's full history intact.
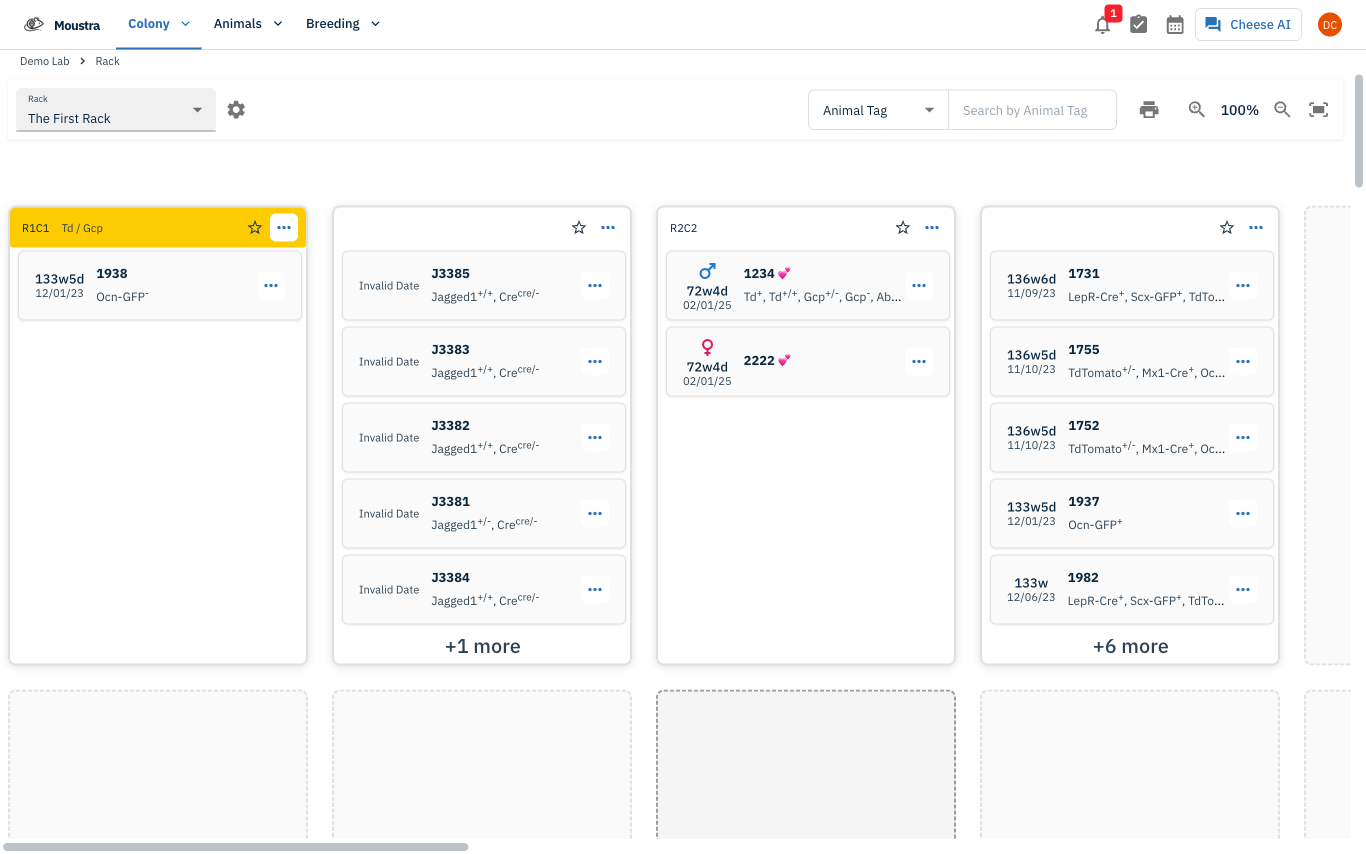
Verify in the destination cage
Open the destination cage to confirm. The animal now appears in the cage's Animals list with its new Cage Tag, and the source cage's count drops to match.
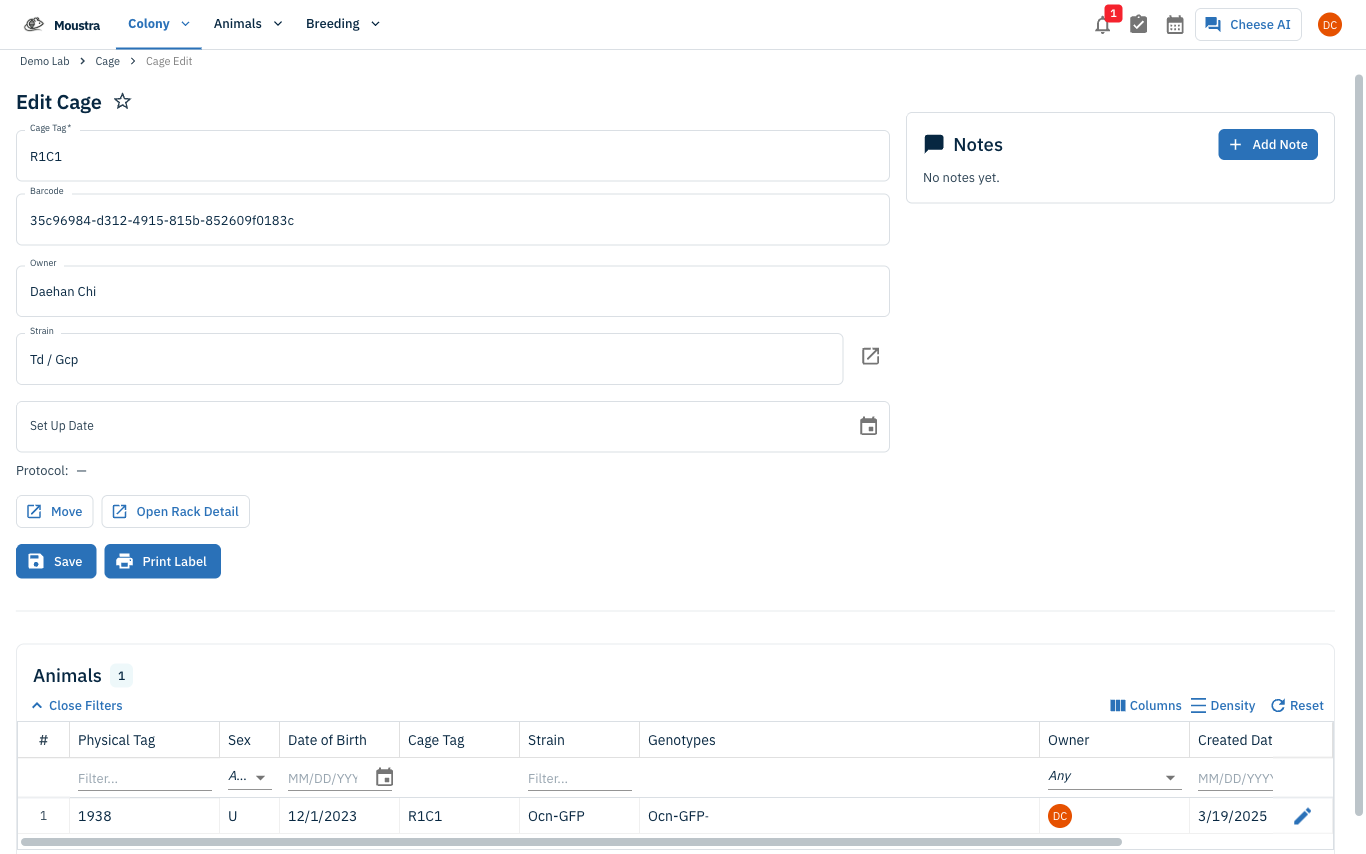
More in Editing your colony
How to Create a New Animal
Step-by-step instructions for adding a new animal, including key fields and tips.
How to Add a New Strain
This guide will walk you through the process of creating a new strain entry in Moustra.
How to Add Breeding Animals
This guide will walk you through the process of creating multiple breeding animals at once in Moustra.