How to Randomize and Blind a Study
Moustra can randomize a study's animals across two or more cohorts, optionally balancing on factors like sex or genotype, and then assign each animal a blinded ID. Both actions run from the study's Animals tab, and blinded IDs can be exported, printed, or cleared at any time.
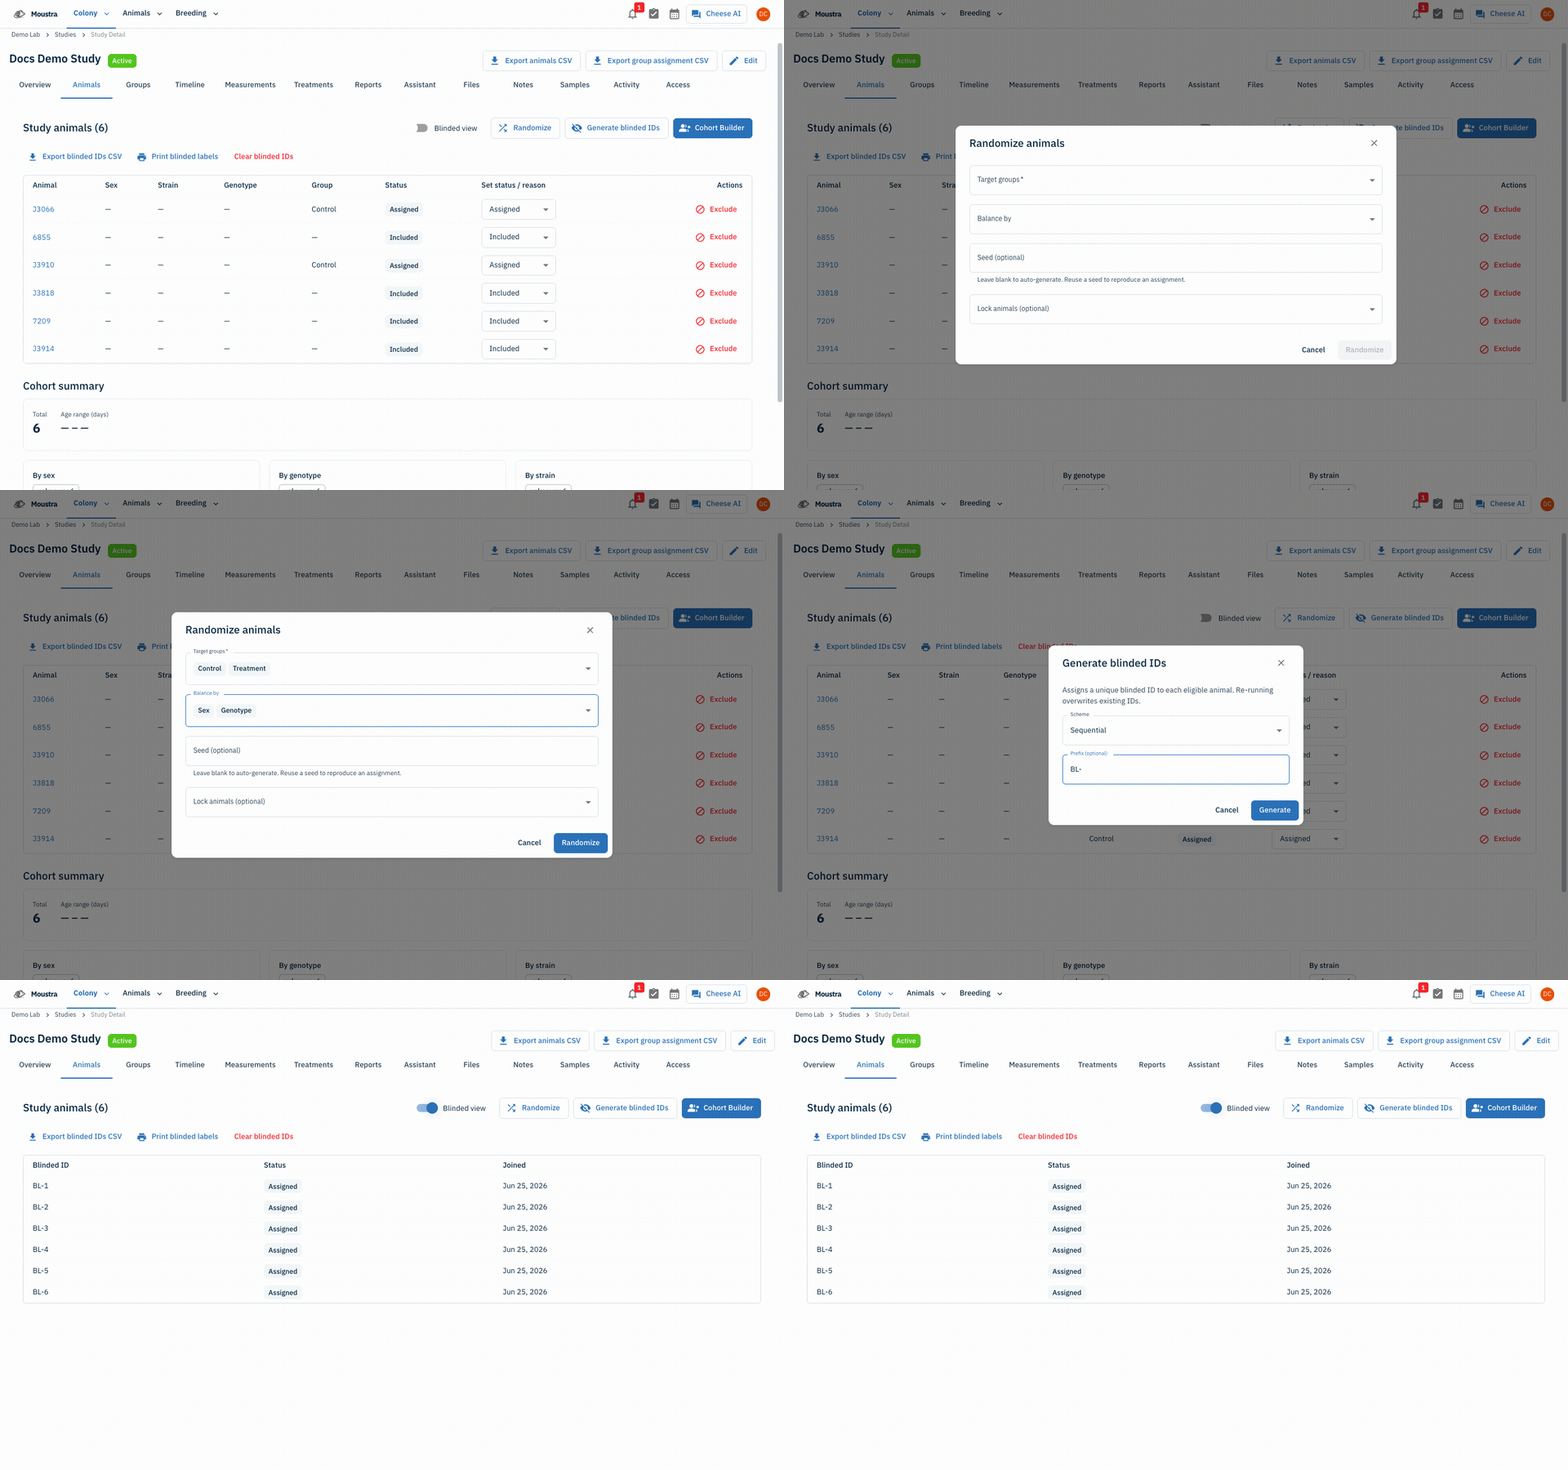
Open the study and go to the Animals tab
Open the study and select the Animals tab. It lists every animal with its Sex, Strain, Genotype, Group, and Status, plus the Randomize, Generate blinded IDs, and Cohort Builder action buttons. Before you start, make sure the study has animals added and at least two cohorts created on the Groups tab — randomization needs at least two target groups.
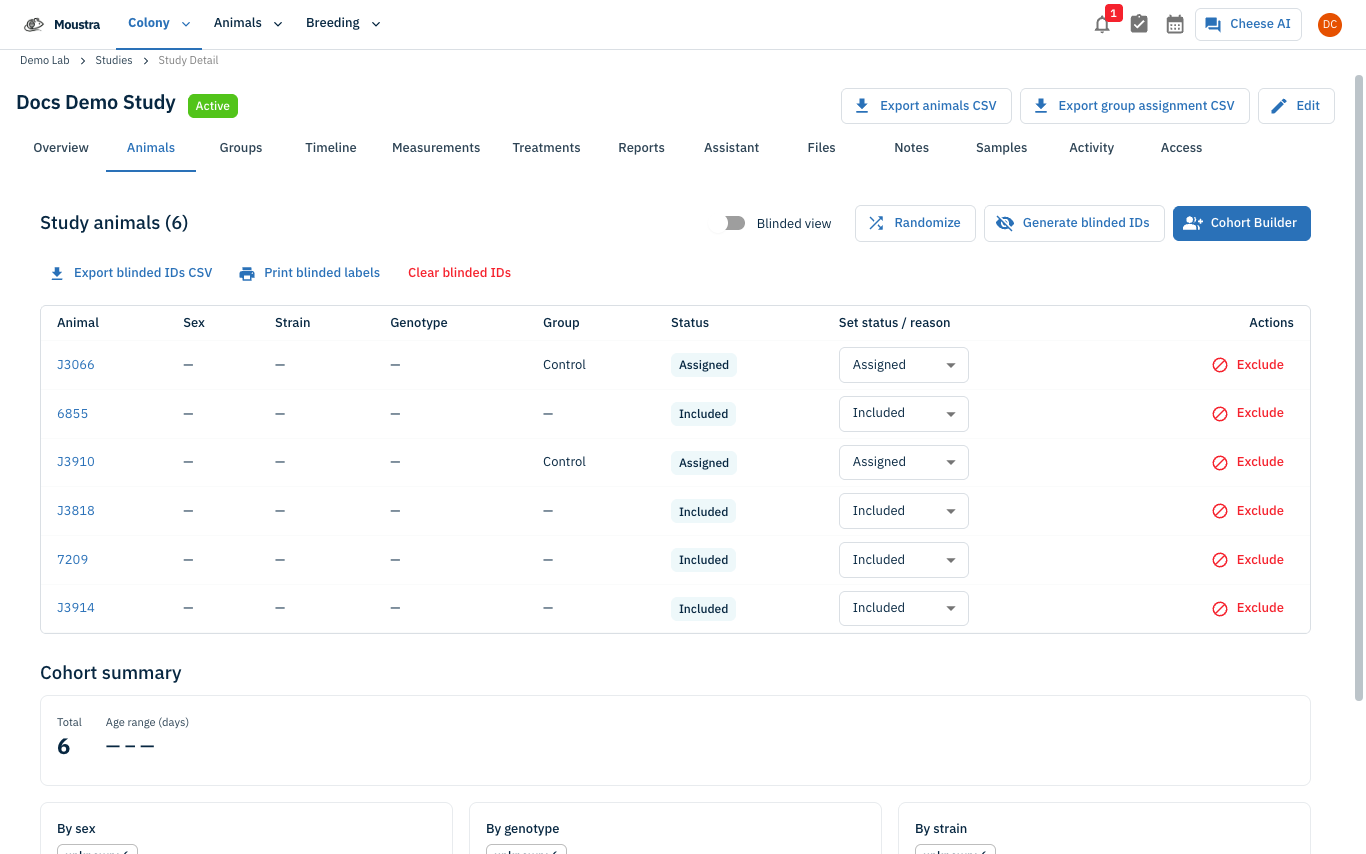
Launch the Randomize dialog
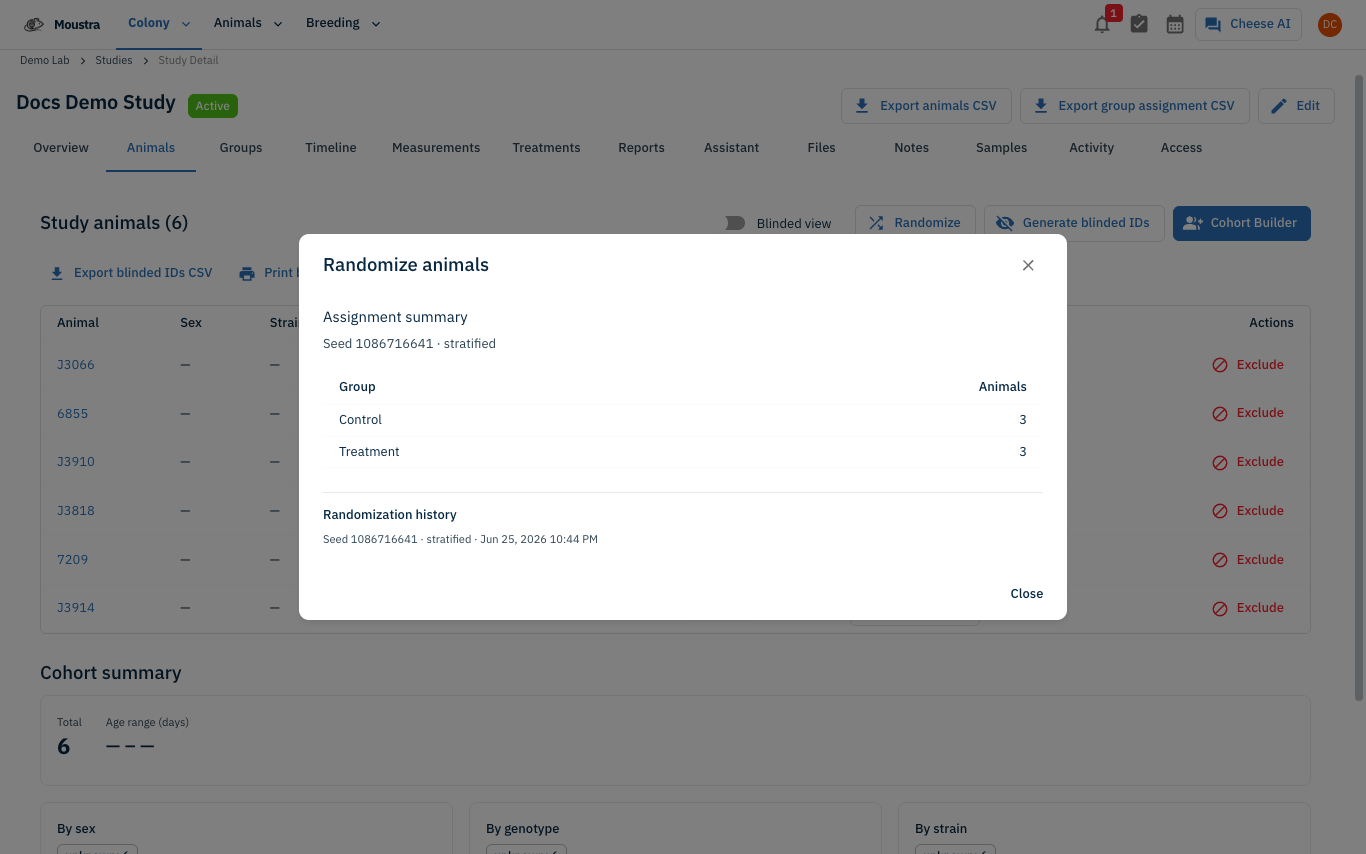
In the action row at the top-right of the Animals tab, click Randomize. The Randomize animals dialog opens. If the study has been randomized before, a Randomization history section lists each previous run with its seed, method, and timestamp.
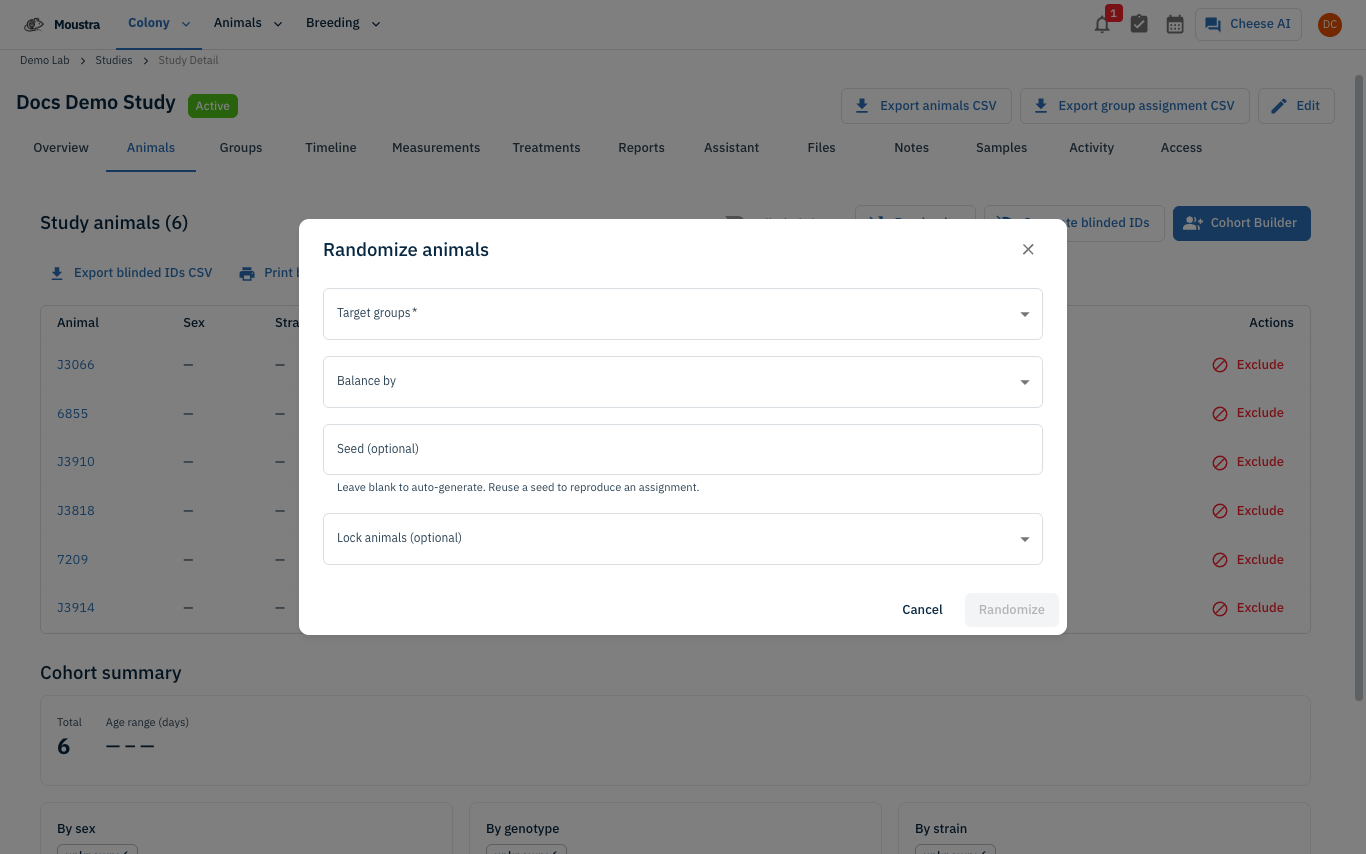
Choose target groups, balancing, and options
Fill in the dialog: Target groups (required — pick at least two cohorts; the Randomize button stays disabled until you do); Balance by (optional stratification on Sex, Genotype, Litter, Cage, or Age); Seed (optional) (leave blank to auto-generate, or reuse a seed to reproduce an assignment); and Lock animals (optional) (animals that should stay in their current group).
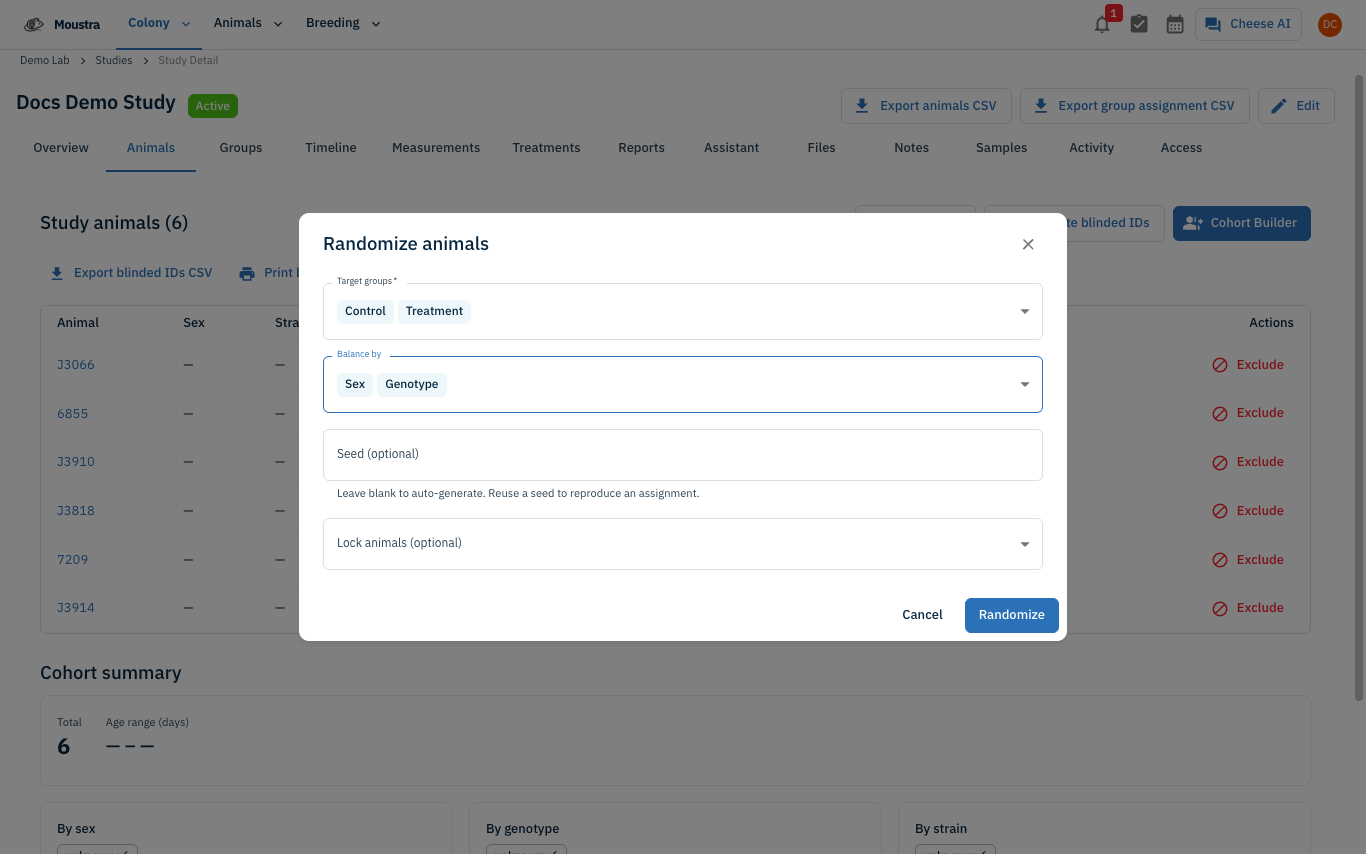
Run randomization and review the assignment
Click Randomize. On success you'll see a "Randomization complete" confirmation, and the dialog switches to an Assignment summary showing the seed and method used plus a per-group table of how many animals landed in each cohort. Click Close — the Animals tab refreshes and the Group column now reflects the new assignments (each animal's status becomes Assigned).
Generate blinded IDs
Back on the Animals tab action row, click Generate blinded IDs. The dialog notes "Assigns a unique blinded ID to each eligible animal. Re-running overwrites existing IDs." Set a Scheme (Sequential or Random) and an optional Prefix (e.g.
BL-), then click Generate. A confirmation reports how many blinded IDs were created.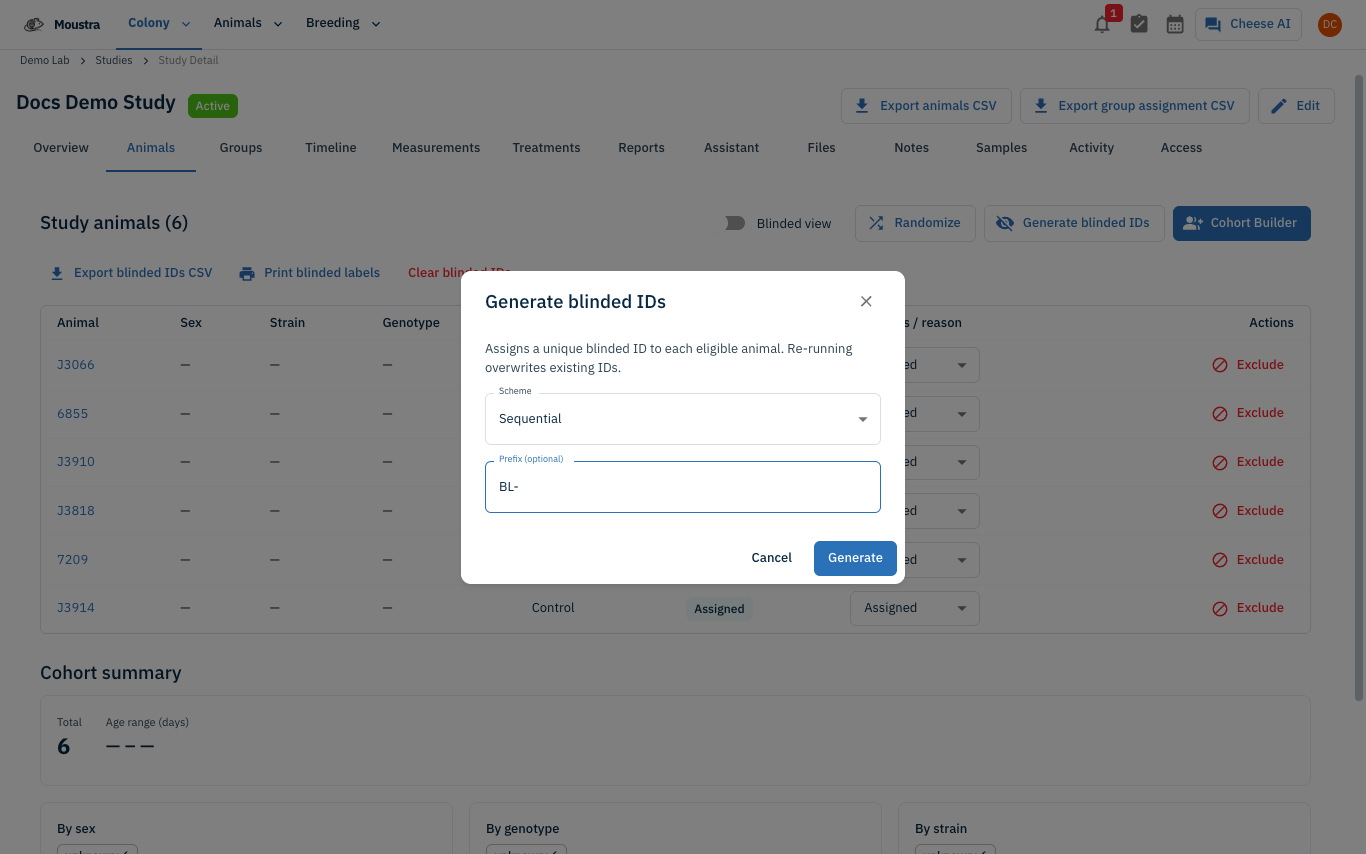
Use the blinded view and export
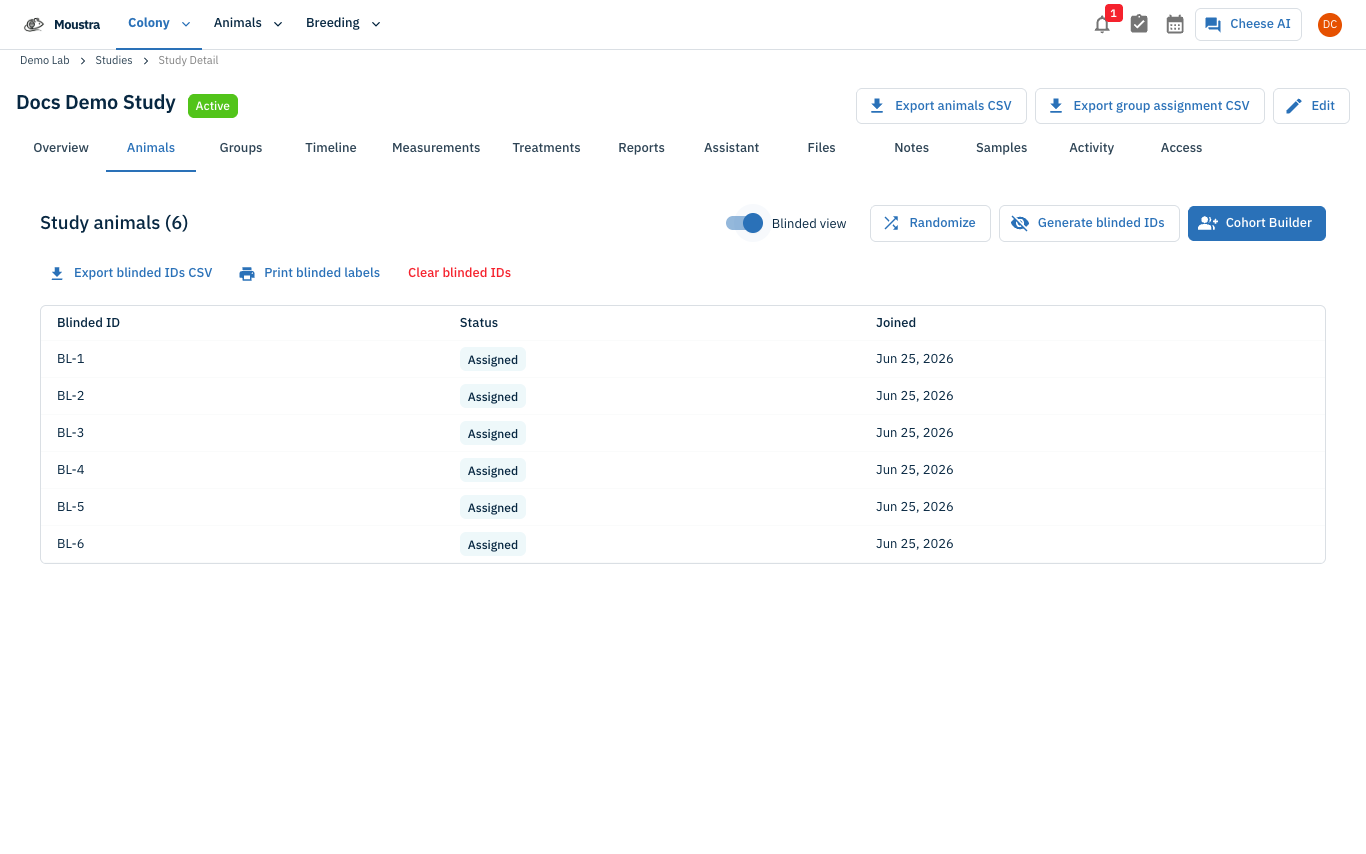
Turn on the Blinded view toggle to see an identity-stripped table of Blinded ID, Status, and Joined date. Use Export blinded IDs CSV to download the blinded mapping, Print blinded labels for a printable sheet, or Clear blinded IDs to remove them all.
More in Advanced
Quick Edit Cell
Edit values directly in any data grid: double-click an editable cell and Moustra shows the right input (text, number, date, or dropdown). Press Enter to save or Escape to cancel.
How to Print Cage Cards
Print cage labels with animal tags, strain, and IACUC information for physical cage identification.
How to Connect Slack
Receive real-time notifications in Slack for litters, weans, and colony milestones without logging into Moustra.