How to Collect and Manage Samples
Samples in Moustra are tissue specimens collected from your animals at takedown. First, in Settings you build a Takedown Schema — a reusable template listing which tissues to take, from which region, in what portion, and how many aliquots. Then, on the Samples page, you run Collect Samples: pick a schema, set a collection date, and choose the animals you are sampling. Moustra creates one sample per animal per tissue. From the sample list you can inline-edit status and tissue, open any sample to edit details or print a tube label, and archive samples you are done with.
Create or confirm a Takedown Schema in Settings
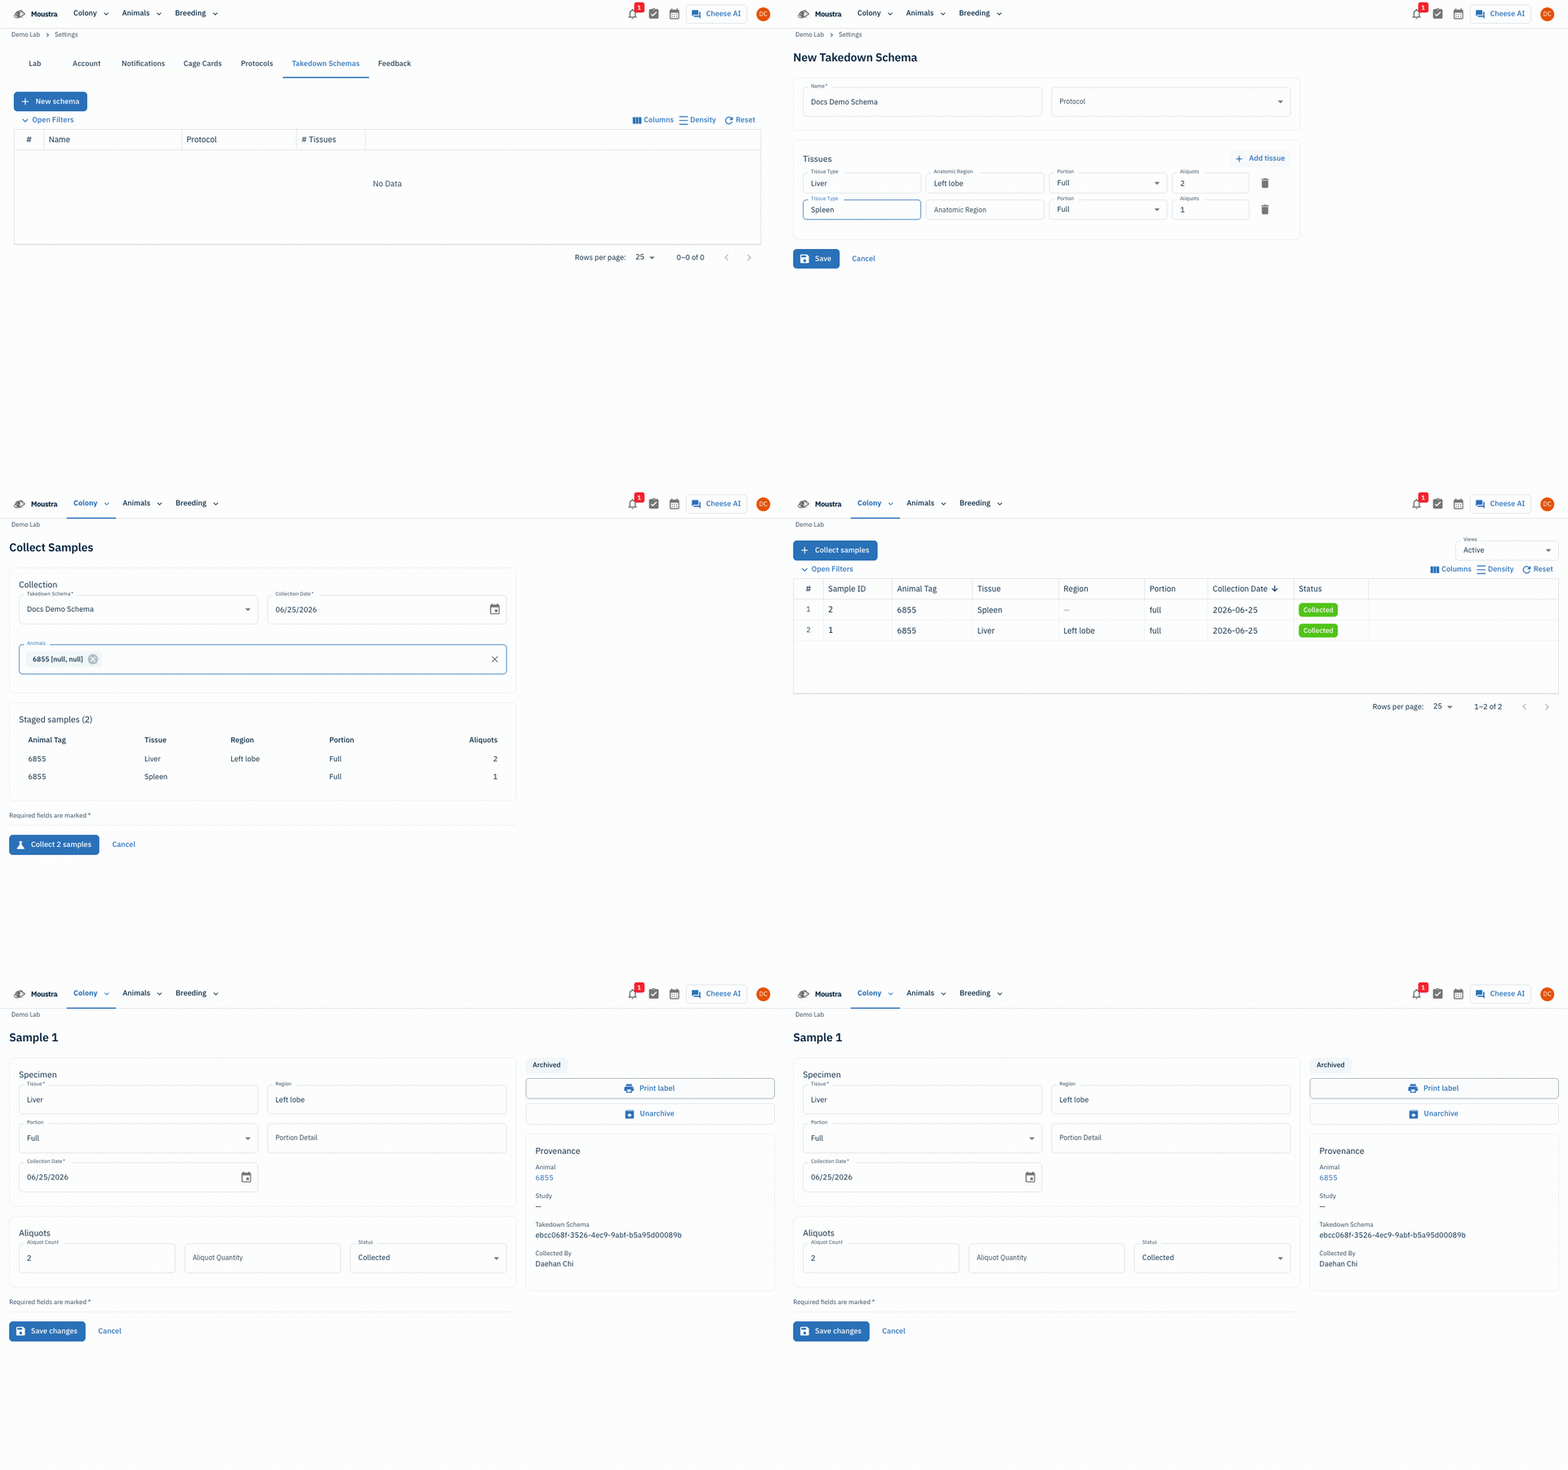
A takedown schema is the template that drives sample collection, so set it up first. Open Settings, then the Takedown Schemas tab (
/settings?tab=takedown-schemas). You'll see a list of existing schemas with their Name, Protocol, and Tissues count. Click New schema (top-right) to open the New Takedown Schema form.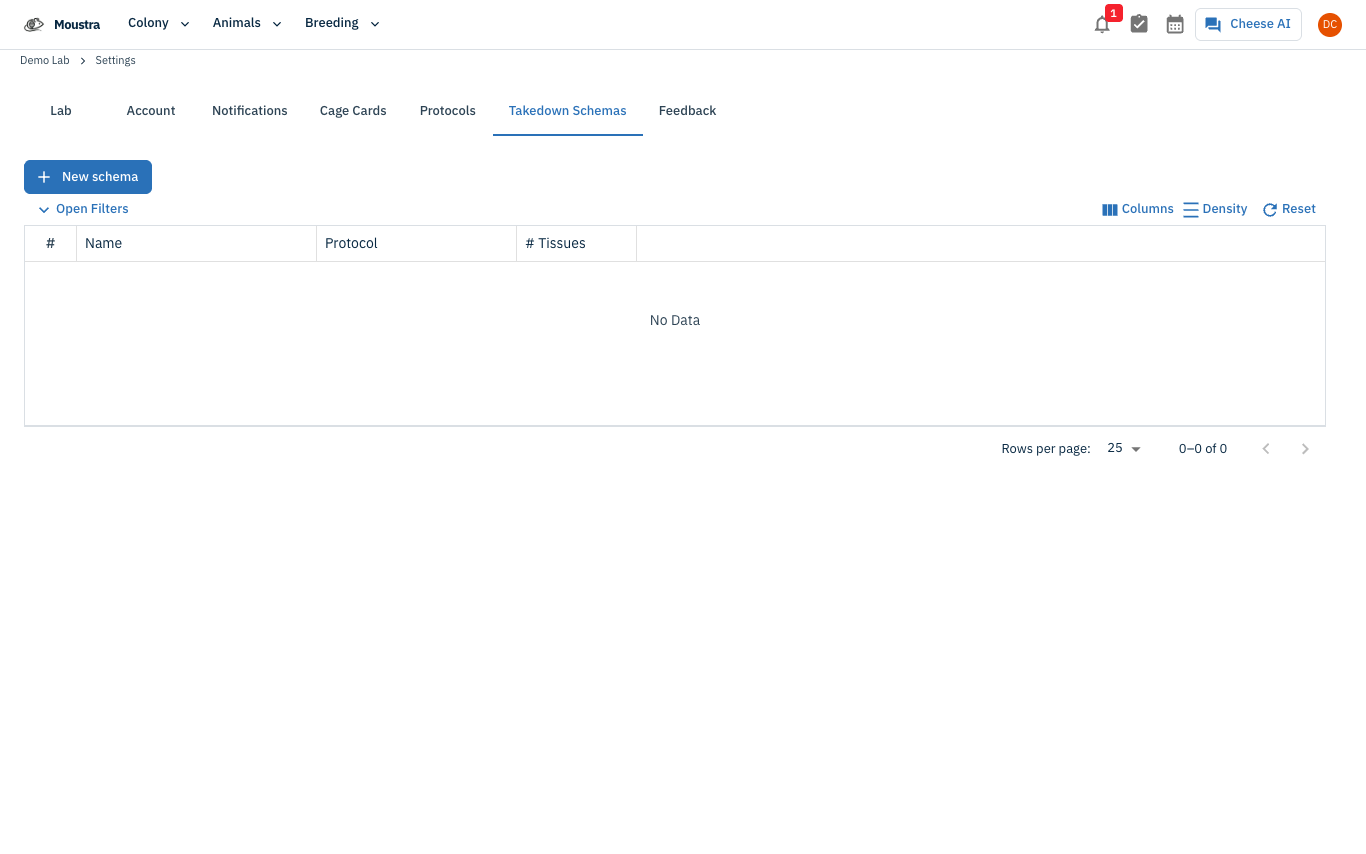
Name the schema and add tissue rows
Give the schema a Name (required) and optionally attach a Protocol. Under Tissues, each row is one tissue to collect: fill in Tissue Type (required), an optional Anatomic Region, a Portion (Full or Partial), and the number of Aliquots (tubes) to create. Use Add tissue for more rows, then click Save.
Open Samples and start Collect Samples
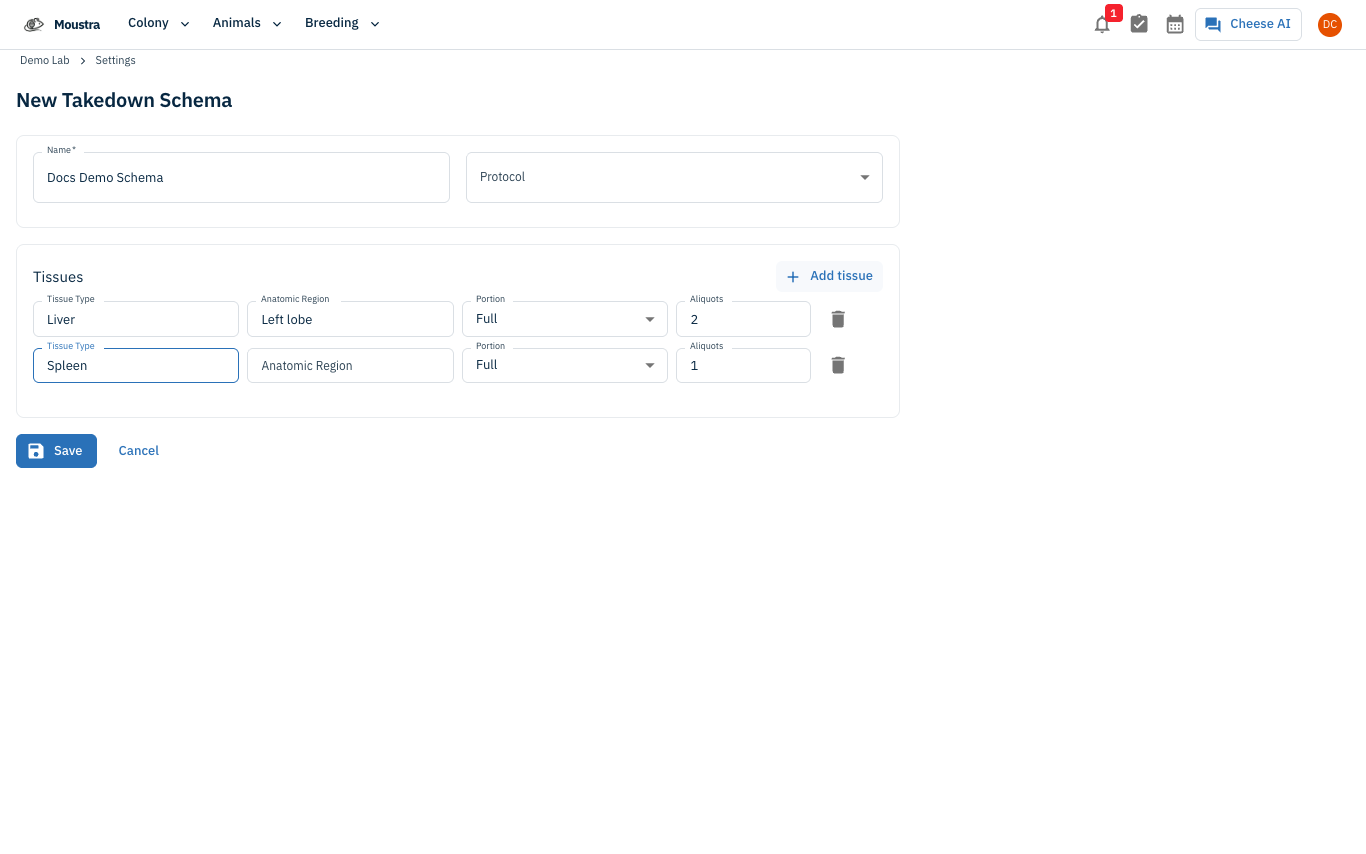
Open Samples from the Colony menu (
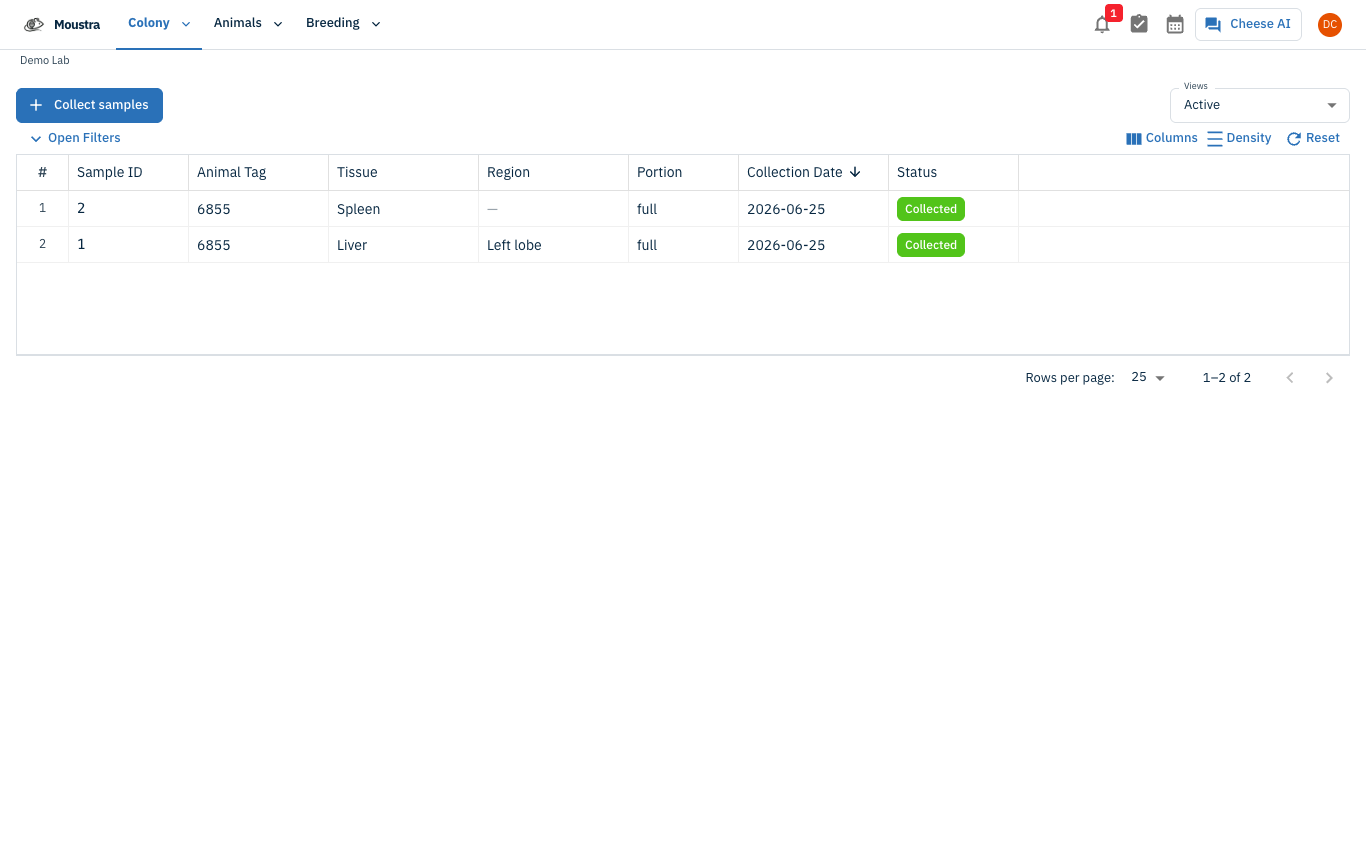
/sample). The list has columns Sample ID, Animal Tag, Tissue, Region, Portion, Collection Date, and Status, with a Views filter (Active / Archived / All) at the top. Click Collect samples (top-left) to open the Collect Samples page.
Pick a schema, set the date, and choose animals
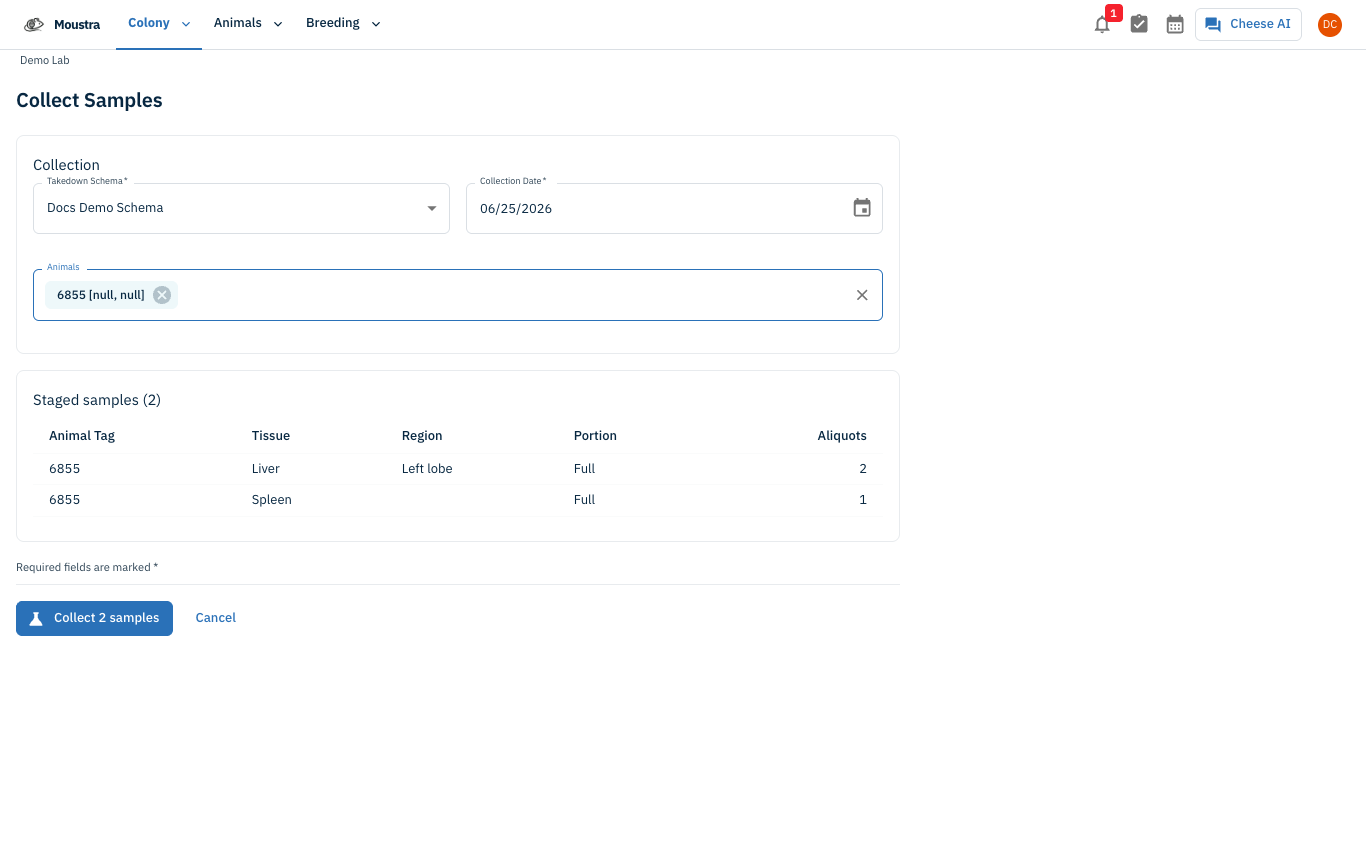
On the Collect Samples page, select a Takedown Schema (required). The Collection Date defaults to today (future dates are blocked). In the Animals field, type a tag or ID and pick each animal from the dropdown — selected animals appear as chips. Repeat for every animal you are sampling.
Review the staged samples and Collect
Once you have a schema and at least one animal, the Staged samples card previews exactly what will be created — one row per animal × per tissue, showing Animal Tag, Tissue, Region, Portion, and Aliquots, with a live total in the header. When the preview looks right, click Collect N samples. Moustra creates the samples and returns you to the list.
View, filter, and inline-edit the sample list
Back on
/sample, your new samples appear with status collected. Use the Views filter to switch between Active, Archived, and All. Double-click an editable cell to edit it inline: Tissue and Region (free text), Portion (Full / Partial), and Status (Collected, Stored, Processing, or Depleted, each color-coded).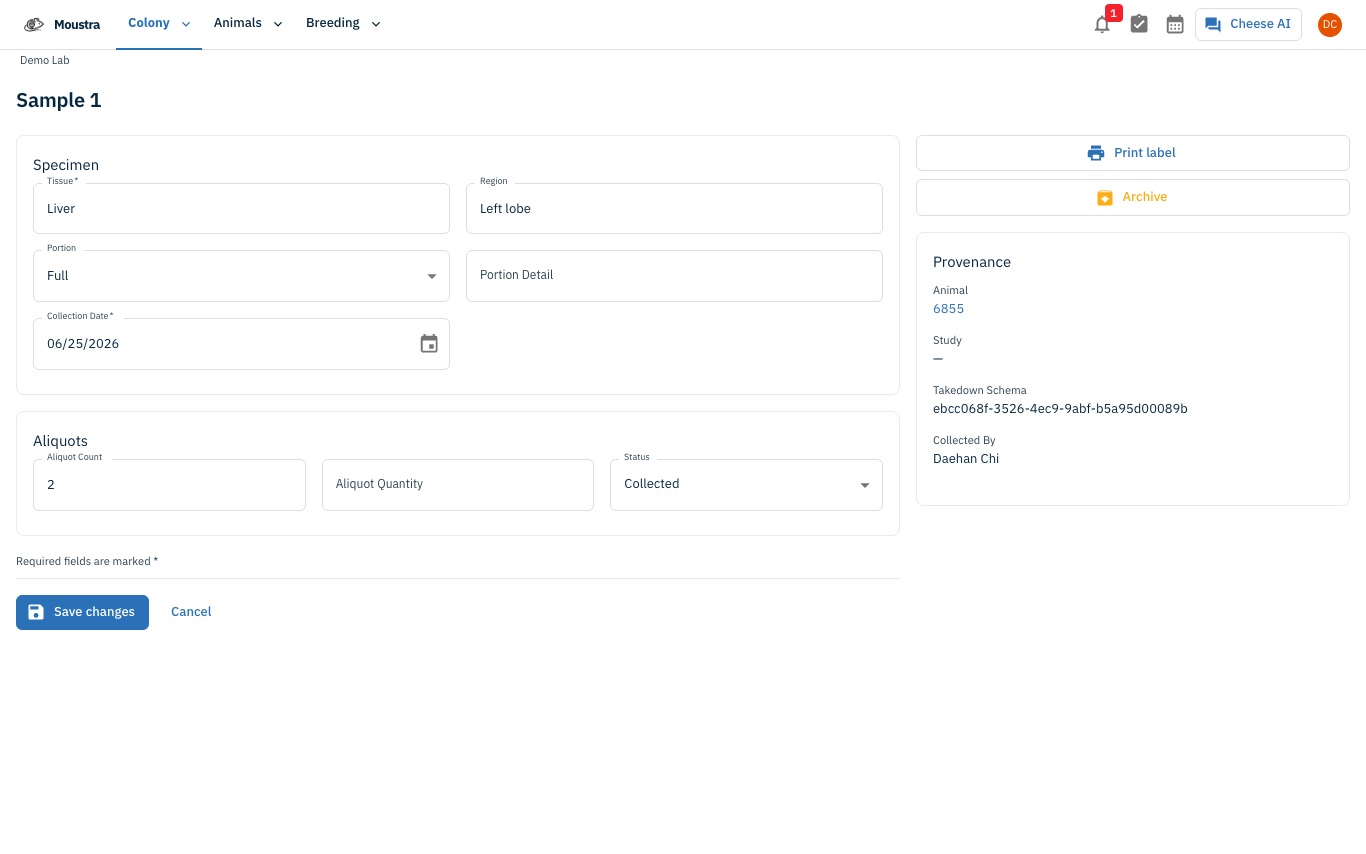
Open a sample to edit details, print a label, or archive it
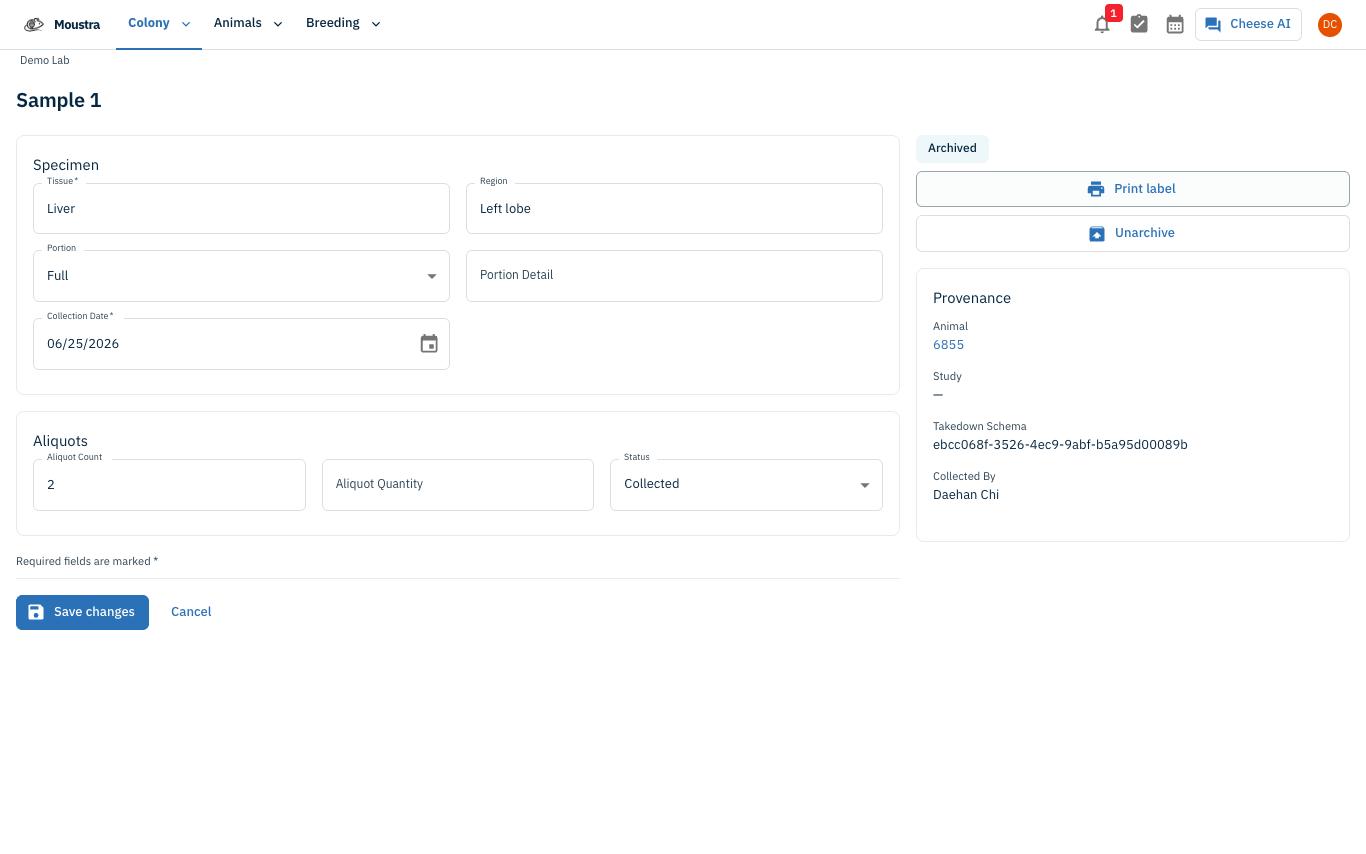
Click a row to open the sample detail page. The Specimen card holds Tissue, Region, Portion, Portion Detail, and Collection Date; the Aliquots card holds Aliquot Count, Aliquot Quantity, and Status. Click Save changes to persist edits. The sidebar shows a read-only Provenance card (Animal, Study, Takedown Schema, Collected By), a Print label button, and an Archive button. Archiving adds an Archived chip and flips the button to Unarchive; archived samples drop out of the default Active view.
More in Advanced
Quick Edit Cell
Edit values directly in any data grid: double-click an editable cell and Moustra shows the right input (text, number, date, or dropdown). Press Enter to save or Escape to cancel.
How to Print Cage Cards
Print cage labels with animal tags, strain, and IACUC information for physical cage identification.
How to Connect Slack
Receive real-time notifications in Slack for litters, weans, and colony milestones without logging into Moustra.