How to Use the Animal Actions Menu
The **Actions** menu at the bottom of an animal's Edit page is the hub for per-animal status changes: mark a wean or tail-sample as done, end the animal (quickly or with full details), revive an ended animal, or delete the record. This guide maps what each entry does — the dedicated guides cover each flow in depth.

Open the Actions menu
Open an animal's Edit Animal page (click any animal in the Animal list or the rack), then click the Actions button at the bottom of the form, next to Save — the menu opens upward. For an active animal it lists five entries: Mark Weaned, Mark Tail Sample Done, End Animal With Details, End Animal, and Delete.
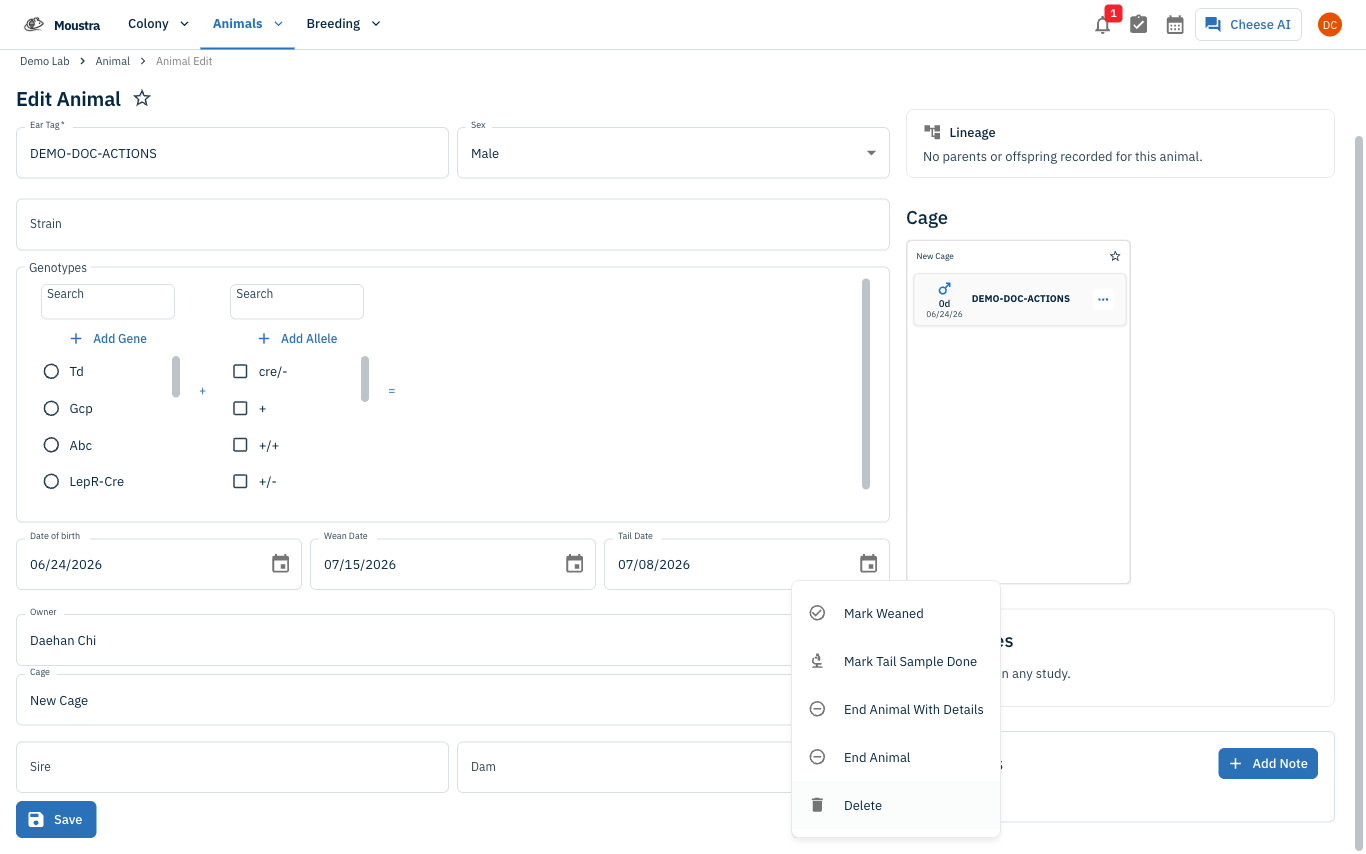
Mark wean or tail sample done
Mark Weaned records that this animal was weaned, with an optional cage move. Mark Tail Sample Done records that its genotyping tail or ear sample was collected. Both clear the matching reminder from the calendar. See How to Mark an Animal as Weaned and How to Mark a Tail Sample as Done for the full flow.
End an animal
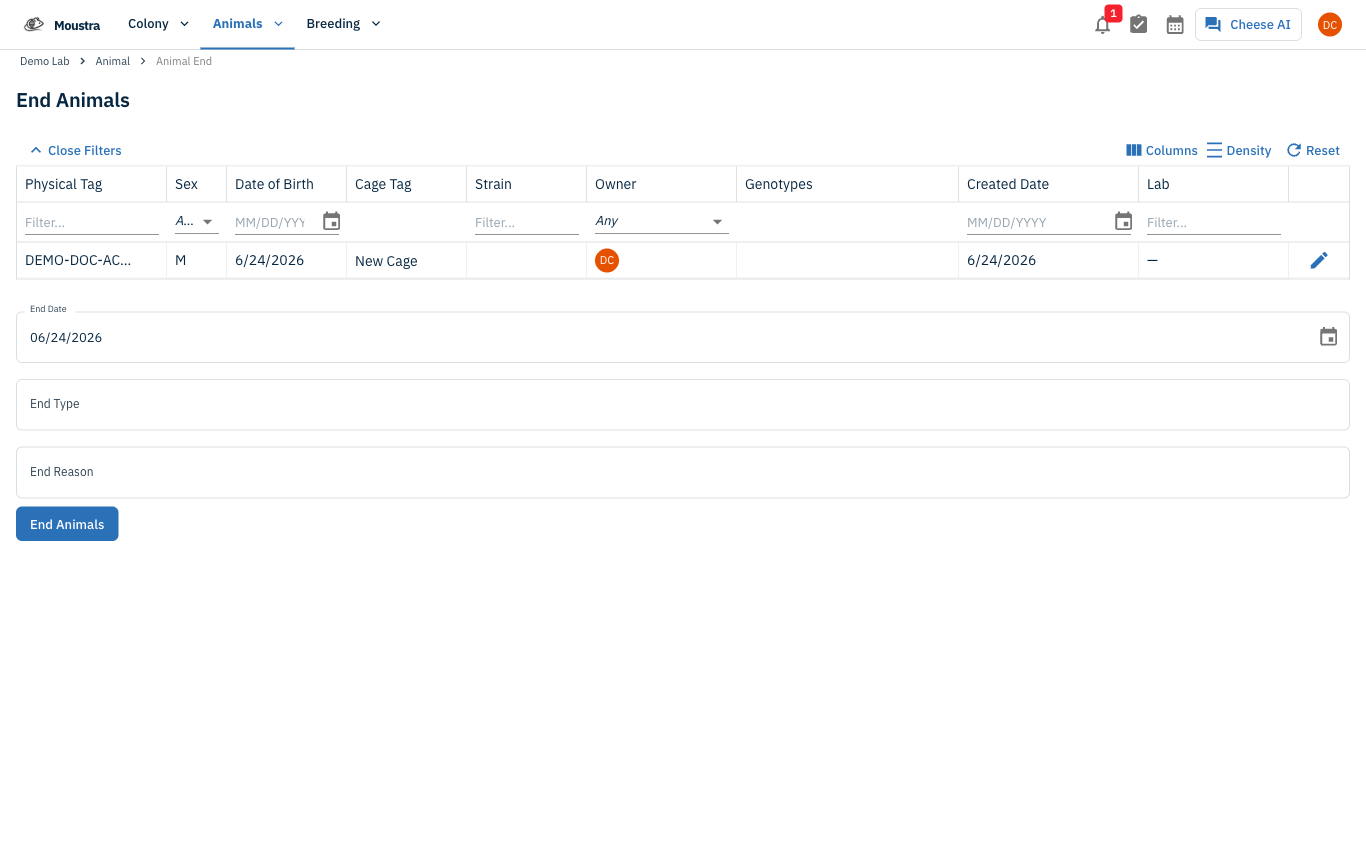
End Animal ends the animal immediately with today's date and no extra detail. End Animal With Details opens the End Animals form, where you set the End Date, End Type, and End Reason — use it to record a cause of death or a transfer. See How to End Animals for the full flow.
Revive an ended animal
Once an animal has been ended, the menu shows a Revive option in place of the wean and end actions. Revive clears the end date and returns the animal to active status. See How to Revive an Animal.
Delete with care
Delete permanently removes the animal record and asks you to confirm — it cannot be undone. Use it only for records that should never have existed; End is almost always the right choice because it preserves the animal's history for lineage and reporting.
More in Editing your colony
How to Create a New Animal
Step-by-step instructions for adding a new animal, including key fields and tips.
How to Add a New Strain
This guide will walk you through the process of creating a new strain entry in Moustra.
How to Add Breeding Animals
This guide will walk you through the process of creating multiple breeding animals at once in Moustra.